
Photo reference for the mountains that Marc gave us all.Recognise this image?
It's Mitre Peak in the South Island of course.
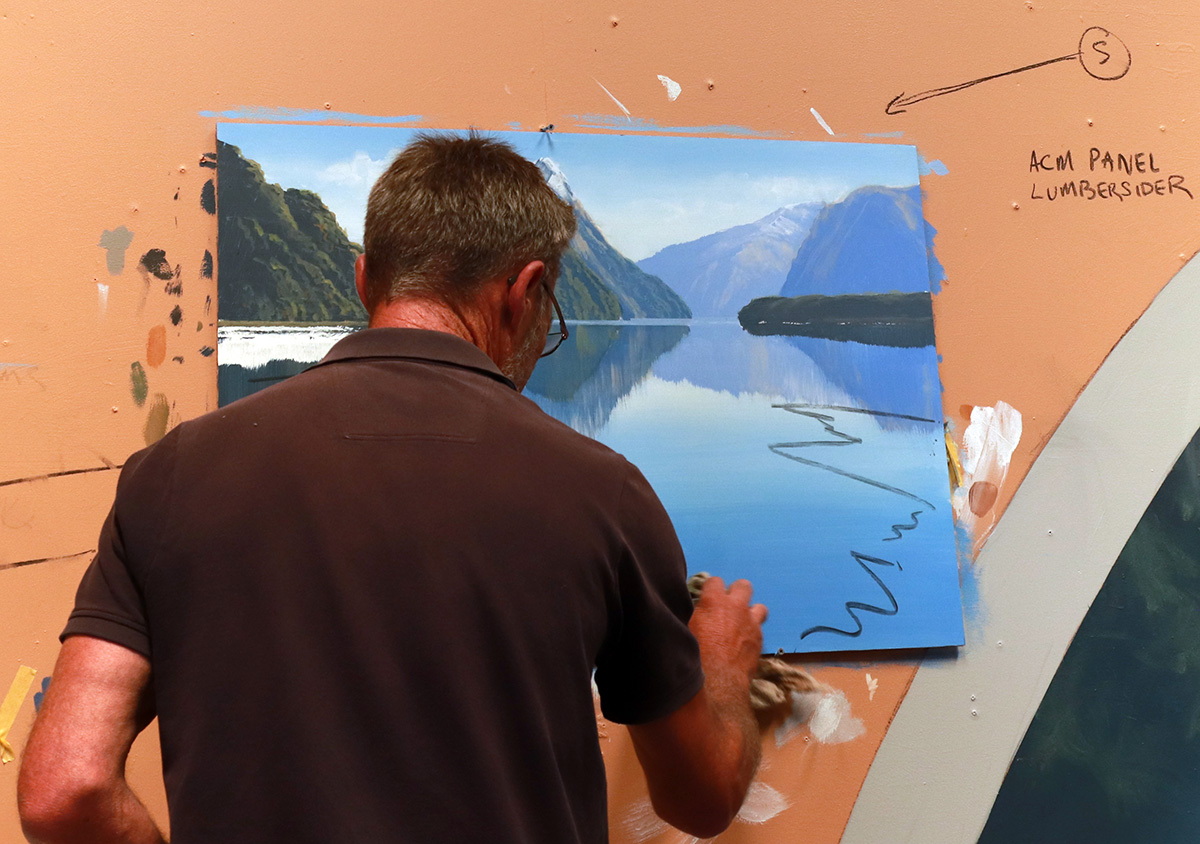
Materials: Using Resene Lumbersider Paints, Resene Quick Dry Undercoat and Resene Glaze.
Like me, Marc is a total Resene devotee.

He uses Resene Quick Dry Undercoat as the base to start on all of his murals and paintings.
He paints all his murals and landscape paintings with Resene lumbersider paint and so do I.
It's brilliant quality,easy to use, comes in an amazing array of colours and is light fast.

Resene Lumbersider spaced out on plastic paint rolling trays.
Brilliant idea, sturdy and plenty of room.
Remembering to keep the palette wet with a spritzer.

Laying down background and numbering colour gradations of mountains from 1 to 6 in charcoal.

Going from light to dark.

Adding dabs of colour for atmospheric perspective with Marc's infallible recipe for landscape success.
Working quickly with confidence.

Everyone working alongside each other with friendly conversation, enjoying the flow of Resene paint from brushes to board.


Pleny of room at the table with cozy, small classes, means plenty of attention.

Everyone is just slightly different


Put on with Willow charcoal that he makes himself.
What a star.
Plenty of step by step demonstrations- you can't fail.
Very good at woodwork, making frames etc
Great systematic and encouraging teacher.
Very positive and enthusiastic person.

Waiting for layers to dry.
Blocking in the tussock first with white.
People said "oh no all my hard work gone", but you need to block it out to make sure the colour remains pure and so the glaze will show up.
Slowly building yup going from dark to light.
.

Going from ight to dark with the glazing and tussock.


This is mine.
The tussock looks like fat fingers, taking on a life of their own.
it made me feel like visiting Mitre Peak again in the South Island.


It's the best way to learn in my opinion.
I am a workshop junkie.
I have been to hundreds over the years.
Keep young and never stop learning.


I would go on another workshop of Marc's because he makes it so easy to achieve a realistic result. These techniques can feed into your own work.
I have a lot of things to try out now.
I am looking forward to getting into my studio to plan my own Conservation mural.
Thanks Marc and everyone else for making my weekend a blast.
Creative Quote of the day
The more that you read, the more things you will know. The more that you learn, the more places you'll go.”
― I Can Read With My Eyes Shut!
A variety of beginner painting workshops featuring Resene paints and additives are taught by me just for your group.
Acrylic animal Paint by numbers, Acrylic paint pouring, acrylic simple landscapes, acrylic flowers and tons more.
Gather a group together and come and have a lovely time in my studio which is set in my organic permaculture garden.
Prices and availability upon application.
Phone 3463435 0273513887
Email janet@jkeen.net
5 Painting Rules You Should Break
When learning to paint, whether you’re self-taught or attending art school or other classes, you’ll inevitably come across techniques or theories that are presented to you as rules you must follow.
Some of these ‘rules’ are actually pretty useful, and if you stick to them you won’t go far wrong.
But there are exceptions to every rule, and it’s important to know when to break them.
Here are 5 painting ‘rules’, along with certain circumstances under which you may want to think twice about those rules.
This is because it’s usually a good idea to keep your darks thin, as it helps with the illusion of depth, and it’s not easy to put thin darks on top of thicker lights, hence why it’s best to get the darks down first.
This is certainly a solid approach and one I follow regularly.
When to break the rule:
The trouble with placing your darkest darks first is that you don’t have anything other than the white canvas to judge them against, so it can be difficult to get the right value initially.
It helps to start with a midtone ground rather than a bright white canvas, but it can also be helpful to place some lighter values right at the start, so you have something to judge your darks against.
Sargent discovered that it helped to leave the dark and light accents until the very end, as he explains:
Black pigments can make your paintings look flat, especially if you use black to darken other colours, or just use it straight out of the tube for dark shadows.
You’ll often end up with a more vibrant painting if you mix your ‘blacks’ from combinations of other colours, such as Ultramarine Blue and Burnt Umber.
When to break the rule:
Black paint certainly has its uses, particularly when mixed with other colours.
Ivory Black actually tends towards blue so it’s possible to use it as a blue substitute. You could mix a very dark shadow colour from Ivory Black and Burnt Umber. Or try mixing black and yellow for some interesting olive greens.
As a general rule I’d advise avoiding tube black, especially if you’re a beginner, but it’s definitely worth experimenting with it to see what effects you can create.
When to break the rule:
As Richard Schmid points out in his classic book Alla Prima, there are a few exceptions to this rule, like when there are a lot of reflections involved, so the light might bounce around into the shadows, affecting the temperature, or when light is travelling through a transparent substance, like water.
In cases like those, don’t rely on the rule, make sure you check the scene and paint what you’re actually seeing, even if it seems to go against the rule you’re familiar with.
This tends to result in a more pleasing and interesting composition than if you placed your focal point, say, dead centre, or too close to the edge of the painting, for example.
When to break the rule:
Using the rule of thirds to help place the elements of your paintings is not a bad practice in general, but if you rely on it too often, your work may become formulaic and predictable, so it’s a good idea to shake things up from time to time by experimenting with unusual compositions.
Try cropping your subject harshly along the edge of your painting, or placing it centrally if you think it will help get your message across.
Sometimes a non-standard composition might be exactly what your painting needs, so don’t be afraid to push the boundaries if you think it will work for you.
Again, there is some truth to this, and it can work, but it’s not a hard and fast rule.
I think this rule comes from the fact that in a landscape scene, the objects in the distance are filtered through more atmosphere, and certain colours are filtered out of our vision. The first colours to be filtered out are the warm oranges, reds and yellows, so that distant objects appear more blue, as well as less saturated, generally speaking.
When to break the rule:
This rule mainly works for landscapes in daylight.
In other lighting conditions, such as sunsets, night scenes, or anything with artificial lighting, you can have very warm colours in the distance, and cool colours in the foreground.
Again, ignore the rule, and just paint what you’re seeing (or not).
Mosaic, Painting (watercolour, acrylic pouring, mixed media, oils and encaustic) and Photography Classes for beginners ( Adults) Mondays, Tuesdays and Wednesday Mornings from 9.30am to 11.30am
After School classes: Mosaics, Painting, Drawing ESOL, Monday. Tuesday and Wednesday After school from 3.30 pm
Ring 346-3435 or 0273513887 to enquire.
Classes fun and fascinating from my home studio/classroom at 374 Clayton Road, Rotorua.
Small classes, plenty of attention in an organic, perma- culture garden, brimming with inspiration and ideas.
Some of these ‘rules’ are actually pretty useful, and if you stick to them you won’t go far wrong.
But there are exceptions to every rule, and it’s important to know when to break them.
Here are 5 painting ‘rules’, along with certain circumstances under which you may want to think twice about those rules.
1. Always Paint from Dark to Light
A common strategy for approaching a painting, is to begin with the darkest darks, and gradually progress through the midtones to the lights, adding your highlights right at the end.This is because it’s usually a good idea to keep your darks thin, as it helps with the illusion of depth, and it’s not easy to put thin darks on top of thicker lights, hence why it’s best to get the darks down first.
This is certainly a solid approach and one I follow regularly.
When to break the rule:
The trouble with placing your darkest darks first is that you don’t have anything other than the white canvas to judge them against, so it can be difficult to get the right value initially.
It helps to start with a midtone ground rather than a bright white canvas, but it can also be helpful to place some lighter values right at the start, so you have something to judge your darks against.
Sargent discovered that it helped to leave the dark and light accents until the very end, as he explains:
Be wary of methods that become too specific. I was taught without deviation to place the lightest light and darkest dark on the canvas first and then to paint everything else in between. Years later, I found it more helpful, if not more efficient, to hold back my lightest light and darkest dark until the painting had reached its final stage. Establishing and fine tuning the middle values first allowed you to better judge the proper light and dark accents. This shouldn’t be taken as a rule per se, but it will often produce a fresher looking finish.
2. Never Use Black Paint
You’ll often hear artists say that you shouldn’t use pre-mixed tubes of black paint, such as Ivory Black or Mars Black, and in general that’s good advice.Black pigments can make your paintings look flat, especially if you use black to darken other colours, or just use it straight out of the tube for dark shadows.
You’ll often end up with a more vibrant painting if you mix your ‘blacks’ from combinations of other colours, such as Ultramarine Blue and Burnt Umber.
When to break the rule:
Black paint certainly has its uses, particularly when mixed with other colours.
Ivory Black actually tends towards blue so it’s possible to use it as a blue substitute. You could mix a very dark shadow colour from Ivory Black and Burnt Umber. Or try mixing black and yellow for some interesting olive greens.
As a general rule I’d advise avoiding tube black, especially if you’re a beginner, but it’s definitely worth experimenting with it to see what effects you can create.
3. Warm Light, Cool Shadows (and vice versa)
This is very close to a hard and fast rule you can rely on – If the light source is warm, then the shadows will be cool, and if the light source is cool, then the shadows will be warm.When to break the rule:
As Richard Schmid points out in his classic book Alla Prima, there are a few exceptions to this rule, like when there are a lot of reflections involved, so the light might bounce around into the shadows, affecting the temperature, or when light is travelling through a transparent substance, like water.
In cases like those, don’t rely on the rule, make sure you check the scene and paint what you’re actually seeing, even if it seems to go against the rule you’re familiar with.
4. The Rule of Thirds
The rule of thirds is a compositional device whereby you divide your painting surface into three equal sections, both horizontally and vertically, and you place your focal point at any one of the intersecting points.This tends to result in a more pleasing and interesting composition than if you placed your focal point, say, dead centre, or too close to the edge of the painting, for example.
When to break the rule:
Using the rule of thirds to help place the elements of your paintings is not a bad practice in general, but if you rely on it too often, your work may become formulaic and predictable, so it’s a good idea to shake things up from time to time by experimenting with unusual compositions.
Try cropping your subject harshly along the edge of your painting, or placing it centrally if you think it will help get your message across.
Sometimes a non-standard composition might be exactly what your painting needs, so don’t be afraid to push the boundaries if you think it will work for you.
5. Warm Colours Advance, Cool Colours Recede
It’s a widely held belief that if you want something to appear closer, you should paint it warmer, and if you want something to recede into the distance you should paint it cooler.Again, there is some truth to this, and it can work, but it’s not a hard and fast rule.
I think this rule comes from the fact that in a landscape scene, the objects in the distance are filtered through more atmosphere, and certain colours are filtered out of our vision. The first colours to be filtered out are the warm oranges, reds and yellows, so that distant objects appear more blue, as well as less saturated, generally speaking.
When to break the rule:
This rule mainly works for landscapes in daylight.
In other lighting conditions, such as sunsets, night scenes, or anything with artificial lighting, you can have very warm colours in the distance, and cool colours in the foreground.
Again, ignore the rule, and just paint what you’re seeing (or not).
Rules are made to be broken
Any time someone tells you a ‘rule’ of painting, try to think of situations where it might not apply, and don’t be afraid to experiment with breaking the rules.Mosaic, Painting (watercolour, acrylic pouring, mixed media, oils and encaustic) and Photography Classes for beginners ( Adults) Mondays, Tuesdays and Wednesday Mornings from 9.30am to 11.30am
After School classes: Mosaics, Painting, Drawing ESOL, Monday. Tuesday and Wednesday After school from 3.30 pm
Ring 346-3435 or 0273513887 to enquire.
Classes fun and fascinating from my home studio/classroom at 374 Clayton Road, Rotorua.
Small classes, plenty of attention in an organic, perma- culture garden, brimming with inspiration and ideas.
No comments:
Post a Comment